Easy Sound Effects For Tiny FX
Continuing our Tiny FX series of guides, in this part, we'll focus on adding sound to our projects. From simple beeps and boops to full audio file playback, this guide will cover how to easily bring audio to your projects.
Adding sound using Tiny FX's MicroPython module is deceptively simple. We will use it to add a simple two-tone siren effect and then move on to recreate the Ghostbusters ECTO 1's screeching siren.
Before starting this part, you should have ideally already gone through our other introductory guides - Getting Started With Tiny FX and then Easy Lighting Effects For Tiny FX. While not essential, they would serve to deepen your knowledge of Tiny FX.
What You'll Need
- Tiny FX or Tiny FX W Starter Kit.
- 2 x LED Dots (Included in Starter Kits).
- Adhesive Backed Mini Speaker 8Ω (1W) (Included in Starter Kits).
- Optional: 2 x LED Strips
- A computer running Microsoft Windows, macOS or Linux.
- Thonny installed on your computer.
- Audacity audio editor installed on your computer.
So, let's get started with the project. First, we connect the LEDs and speaker to Tiny FX.
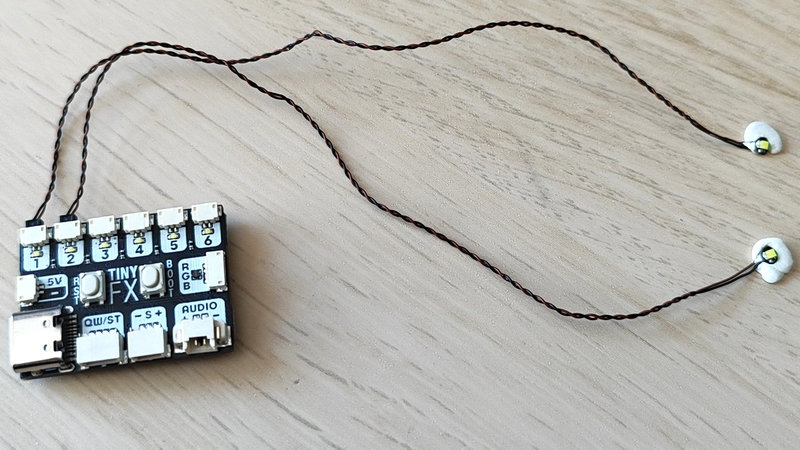
- Connect the LED Dots / Strips to ports one and two of Tiny FX.
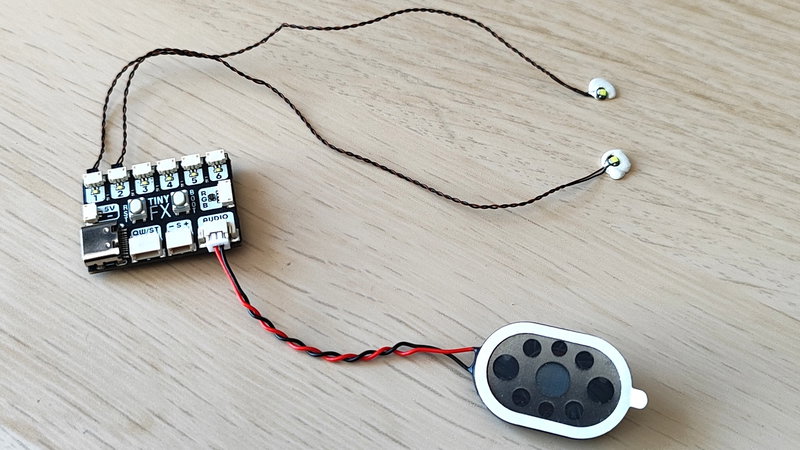
- Connect the speaker to the Audio port. The speaker connection will only go in one way. Typically the red wire is positive, and the black wire is negative.
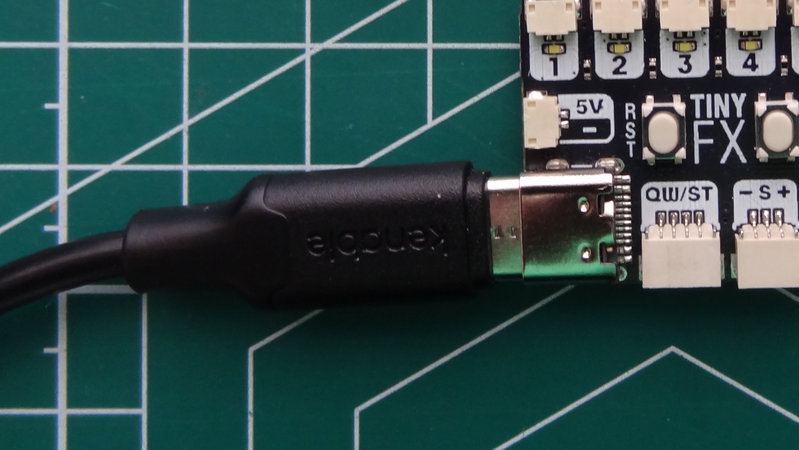
- Using a good quality USB Type C cable, connect Tiny FX to your computer and open Thonny. We assume that you have already gone through the steps in part one to set up Thonny.
Generating Audio Tones
Tiny FX can generate simple tones - beeps and boops - for if you require more retro sound effects. Here we are going to use the same LEDs and speaker hardware as before, but the code will generate tones to play on the speaker, in time with flashing the LEDs. This will produce an effective emergency vehicle siren.
If you just want the code for this part of the project, go to step 17.
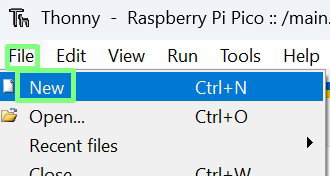
- With Tiny FX connected to your computer, open Thonny and create a new file.
- In the new file, import three modules (libraries) of pre-written code.
time: Enables control of pace and pauses in the code.tiny_fx: Enables our code to interact with the Tiny FX board.import time from tiny_fx import TinyFX
- Create a tuple called
TONESand use it to store the audio frequency of the notes. The 440 relates to an A4, and 330 to E4 musical notes. There are online resources to help convert tones / notes to their corresponding frequencies.TONES = (440, 330) - Use two more tuples to store the duration that the note is played, and the output LEDs that are used.
DURATIONS = (0.2, 0.2) OUTPUTS = (1, 2) - Create a variable (a named object that holds information) called
tinyto make it easier for us to write code that interacts with Tiny FX.tiny = TinyFX() - Inside a
trystatement, create awhile Trueloop. These lines will try and run the code within, in this case a loop that will continuously run. If the code cannot be run, then a laterfinallystatement is run which will ensure that Tiny FX is left in a good state before the code ends.try: while True: - Using a
while notloop, check that theBOOTbutton has not been pressed. This will runpasswhich keeps Tiny FX waiting for theBOOTbutton to be pressed.while not tiny.boot_pressed(): pass - Use
tiny.clear()to turn off any active LED outputs.tiny.clear() - Next create two
forloops. The first will run eight times, the second will run for every tone in theTONEStuple. TheTONEStuple contains only two tones, 440 and 330. If we played just those two tones, then the siren would be very short. Using the firstforloop we repeat the playback eight times.for _ in range(8): for i in range(len(TONES)): - Inside the
forloops, set the current tone, the duration that it should be played, and turn on the corresponding LED output. Here we get the current tone from the tuple using its position[i], then the corresponding duration from that tuple. Finally an output is selected.tone = TONES[i] duration = DURATIONS[i] output = OUTPUTS[i] - Play the currently selected tone. The value
1.0corresponds to volume. The volume range is between0.0and1.0.if tone: tiny.wav.play_tone(tone, 1.0, tiny.wav.TONE_SQUARE) - Use
tiny.clear()to turn off any active LED outputs.tiny.clear() - Turn on the currently selected output. This will flash the output LED each time the tone changes.
if output: tiny.outputs[output - 1].on() - Using its
duration, wait for the tone to stop playing before calling a stop to playback.time.sleep(duration) tiny.wav.stop() - Insert a short pause between each tone playback and then ensure all of the LED outputs are off.
if tone: time.sleep(0.01) tiny.clear() - In a
finallysection shutdown Tiny FX. Thefinallyis the end of thetrythat we created earlier. Python calls this atry-finally statement. Thefinallyis activated, as a means to clean up the code. It shuts down Tiny FX in a controlled manner before the code exits.finally: tiny.shutdown() Check that your code looks like this.
import time from tiny_fx import TinyFX TONES = (440, 330) DURATIONS = (0.2, 0.2) OUTPUTS = (1, 2) tiny = TinyFX() try: while True: while not tiny.boot_pressed(): pass tiny.clear() for _ in range(8): for i in range(len(TONES)): tone = TONES[i] duration = DURATIONS[i] output = OUTPUTS[i] if tone: tiny.wav.play_tone(tone, 1.0, tiny.wav.TONE_SQUARE) tiny.clear() if output: tiny.outputs[output - 1].on() time.sleep(duration) tiny.wav.stop() if tone: time.sleep(0.01) tiny.clear() finally: tiny.shutdown()- In Thonny, click on the green
RUNbutton to start the code. PressBOOTon Tiny FX to start the sound and lights. You should see the lights flash in time to the tones. Click onSTOPwhen you are finished testing. - Click on
File >> Saveand save the code astone-siren.pyto Tiny FX.
This simple, yet effective means to generate tones can be used to add sound effects to many different types of models, without the need for WAV audio files.
Wave Audio Playback
In part two we created lighting effects for two models. A Ghostbusters ECTO 1 and a Star Wars Imperial Tie Fighter. Now we will add an authentic siren for ECTO 1 using a Wave (WAV) audio file.
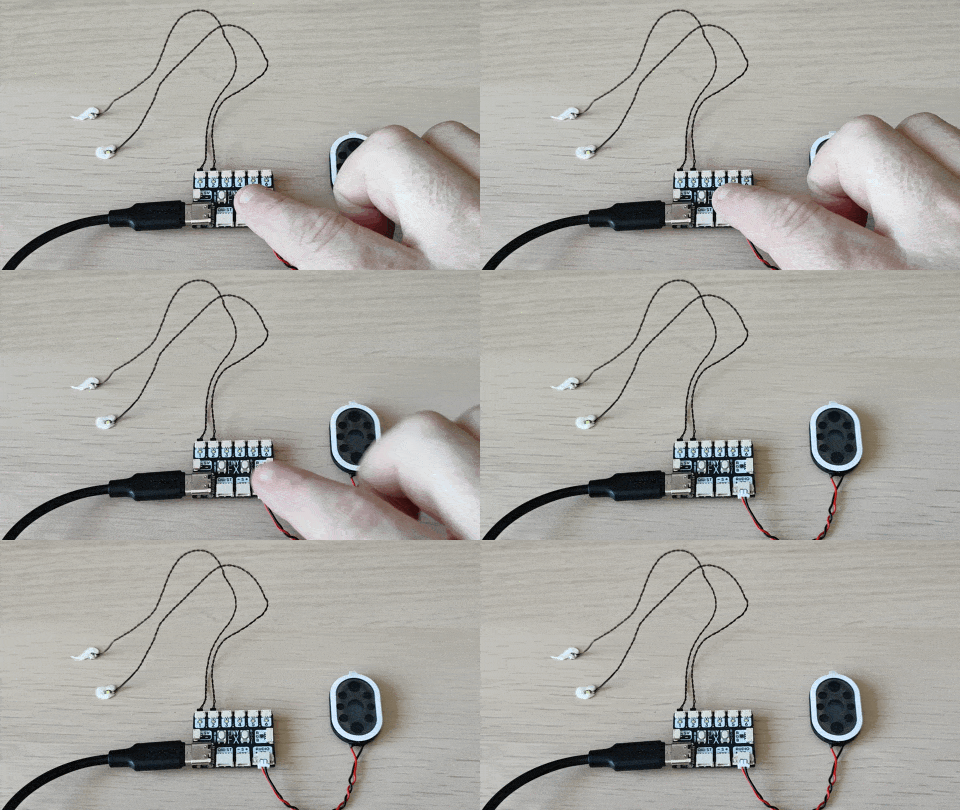
We'll be using LED dots for our lighting effect. The LED Dots do a great job for pin focused sections of light, but if we need a wide splash of light, then we could swap the dots for strips that will throw light around your builds as they have two LEDs per strip. We'll leave the decision up to you.
For sound, we will attach a speaker to Tiny FX and then use a MicroPython module (library of pre-written code) to play WAV files (Wave audio files, common to many operating systems.) in sync with the light effects.
Writing the Code
The goal now is to write the code that will play the sound effect and flash the LEDs at the same time. The trigger for this to happen will be the BOOT button, located in the centre of the Tiny FX's board.
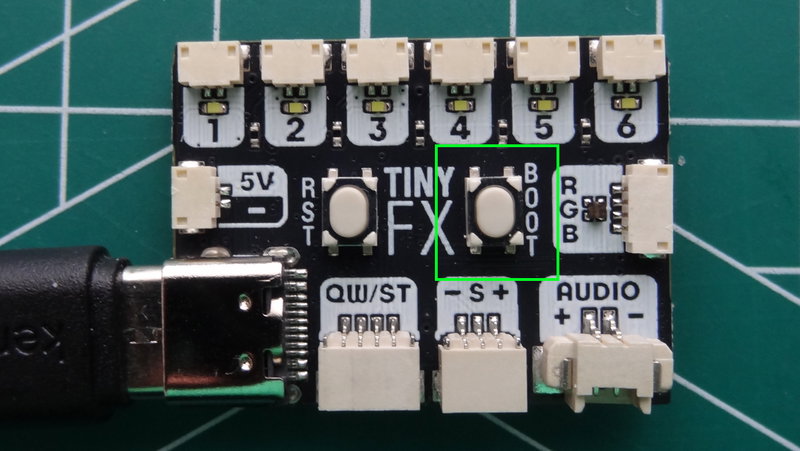
If you just want the code for this part of the project, go to step 12.
- In Thonny, click on
File >> Newto create a new blank file. - In the new file, import three modules (libraries) of pre-written code.
tiny_fx: Enables our code to interact with the Tiny FX board.picofx: Enables access to special Tiny FX functionality, in this case the single-colour LEDMonoPlayer.picofx.mono: Contains effects for single-colour LEDs, in this instance we import the flashing LED effect.from tiny_fx import TinyFX from picofx import MonoPlayer from picofx.mono import FlashFX
- Create a variable (a named object that holds information) called
tinyto make it easier for us to write code that interacts with Tiny FX. Point the variable to the location of the folder that contains the sound effect used in this project. Tiny FX has 4MB of onboard storage and this is where our sound effects (sfx) folder will be located. Later we will cover the creation of audio effects and where to store them in Tiny FX's onboard storage.tiny = TinyFX(wav_root="/sfx") - Create another variable,
player, as an easier way to use the effects insideMonoPlayerwith Tiny FX's outputs.player = MonoPlayer(tiny.outputs) Using
player.effectsset the first and second LED dots to create a flashing effect to simulate the blue lights on top of the vehicle. The GIF below demonstrates what this effect will look like.- Set the flashing speed to
1.0(one second). Setting this to2.0would make the LEDs twice as fast. - Set the number of
flashes. - Set the
window, the percentage of time in which the flashes are performed. - Set the
phaseto control when in the flash cycle the effect is performed. This is 0 for the first LED, 0.5 for the second. This creates the offset flashing pattern. - Set the
dutyto control how long the flash is on for.player.effects = [ FlashFX(speed=1.0, # Flashing "blue" light 1 flashes=1, window=0.2, phase=0.0, duty=0.5), FlashFX(speed=1.0, # Flashing "blue" light 2 flashes=1, window=0.2, phase=0.5, duty=0.5), None, None, None, None ]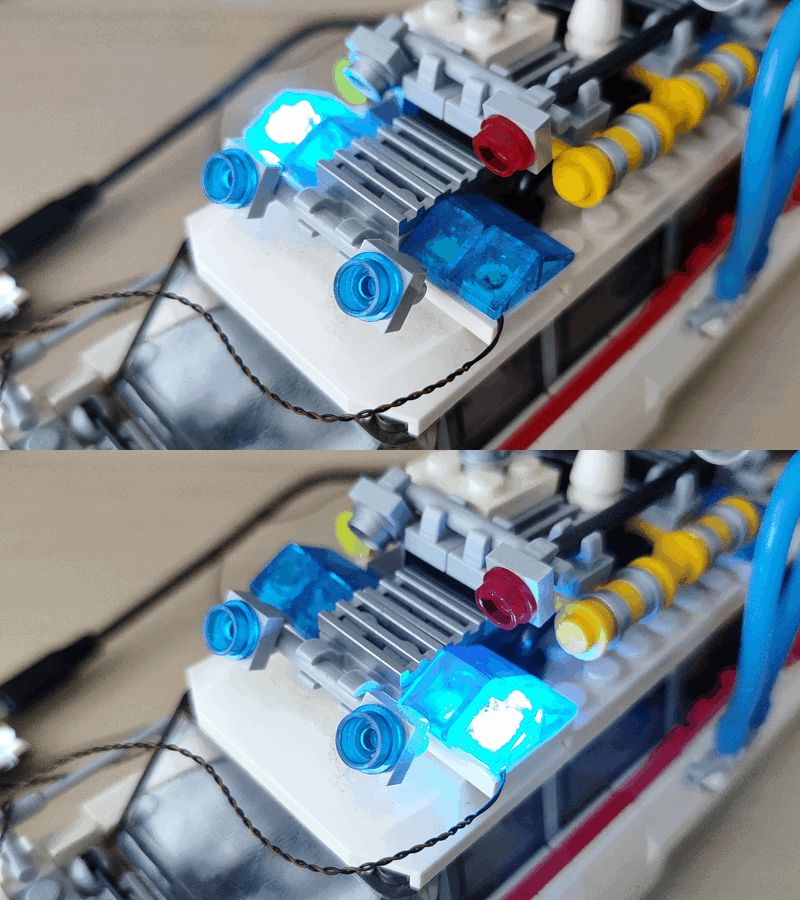
- Set the flashing speed to
Inside a
trystatement, create awhile Trueloop. These lines will try and run the code within, in this case a loop that will continuously run. If the code cannot be run, then a laterfinallystatement is run which will ensure that Tiny FX is left in a good state before the code ends.try: while True:- Use an
ifcondition to check if the user has pressed the BOOT button.if tiny.boot_pressed(): - Start
playerto flash the LEDs and then start playing the audio file.player.start() tiny.wav.play_wav("ecto1.wav") - Use a
whileloop to check that the audio file is playing, and while it does, use apassstatement to continue playback. This check is performed each time the loop goes round, when the audio file stops playback, thetiny.wav.is_playing()becomesFalseand the code will break out of the loop and move on to the next section.while tiny.wav.is_playing(): pass - Create an
elsecondition (to match theifcondition we made earlier) that stops the player controlled animation, and usestiny.one.off()andtiny.two.off()to turn the LEDs off. Theelsecondition is always run when the BOOT button has not been pressed.else: player.stop() tiny.one.off() tiny.two.off() - In a
finallysection shutdown Tiny FX. Thefinallyis the end of thetrythat we created earlier. Python calls this atry-finally statement. Thefinallyis activated, as a means to clean up the code. It shuts down Tiny FX in a controlled manner before the code exits.finally: tiny.shutdown() Check that your code looks like this.
from tiny_fx import TinyFX from picofx import MonoPlayer from picofx.mono import FlashFX tiny = TinyFX(wav_root="/sfx") player = MonoPlayer(tiny.outputs) player.effects = [ FlashFX(speed=1.0, flashes=1, window=0.2, phase=0.0, duty=0.5), FlashFX(speed=1.0, flashes=1, window=0.2, phase=0.5, duty=0.5), None, None, None, None ] try: while True: if tiny.boot_pressed(): player.start() tiny.wav.play_wav("ecto1.wav") while tiny.wav.is_playing(): pass else: player.stop() tiny.one.off() tiny.two.off() finally: tiny.shutdown()- Save the code to Tiny FX as
main.pyThis will auto-start the code when Tiny FX is powered up, but remember that it will overwrite the currentmain.pyfile so backup the code if you haven't already done so.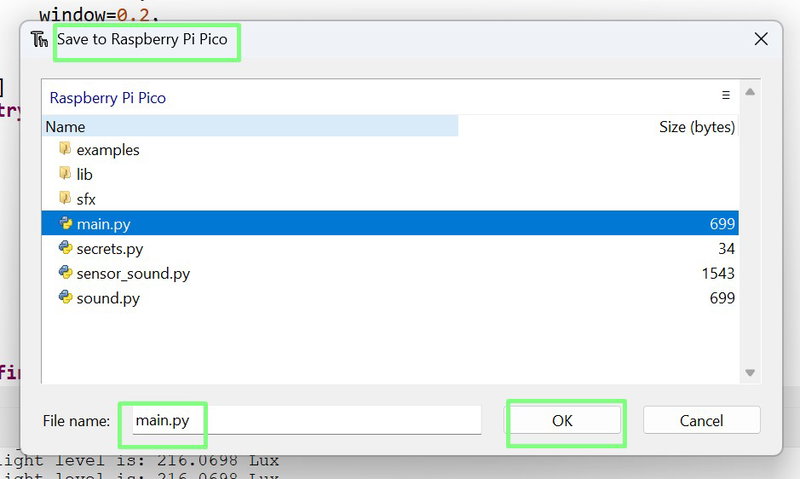
Adding An Audio File
Before we can run the code, we need to add a sound effect for Tiny FX to play. To do this we need to copy a WAV audio file over to Tiny FX.
For this part of the project, we used a 16-bit, 11025 Hz, Mono WAV (Wave) audio file of a siren. Higher quality effects can be used, but that also means larger file sizes. As the audio output is mono, it would be wasteful (from a quality and file size perspectives) to use stereo audio files. You can easily find audio files via your search engine or create your own. Using software such as Audacity, we can record / edit the audio to meet our needs.
Remember, save your audio as a 16-bit, 11025 Hz, Mono WAV file.
- In Thonny click on
View >> Filesand check that Files has been selected. This will open the Files pane on the left of the screen.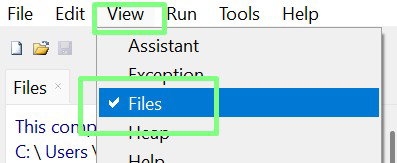
- Under
Filesand in theRaspberry Pi Picopane, right click on a blank area and select 'New Directory', then call the directorysfx.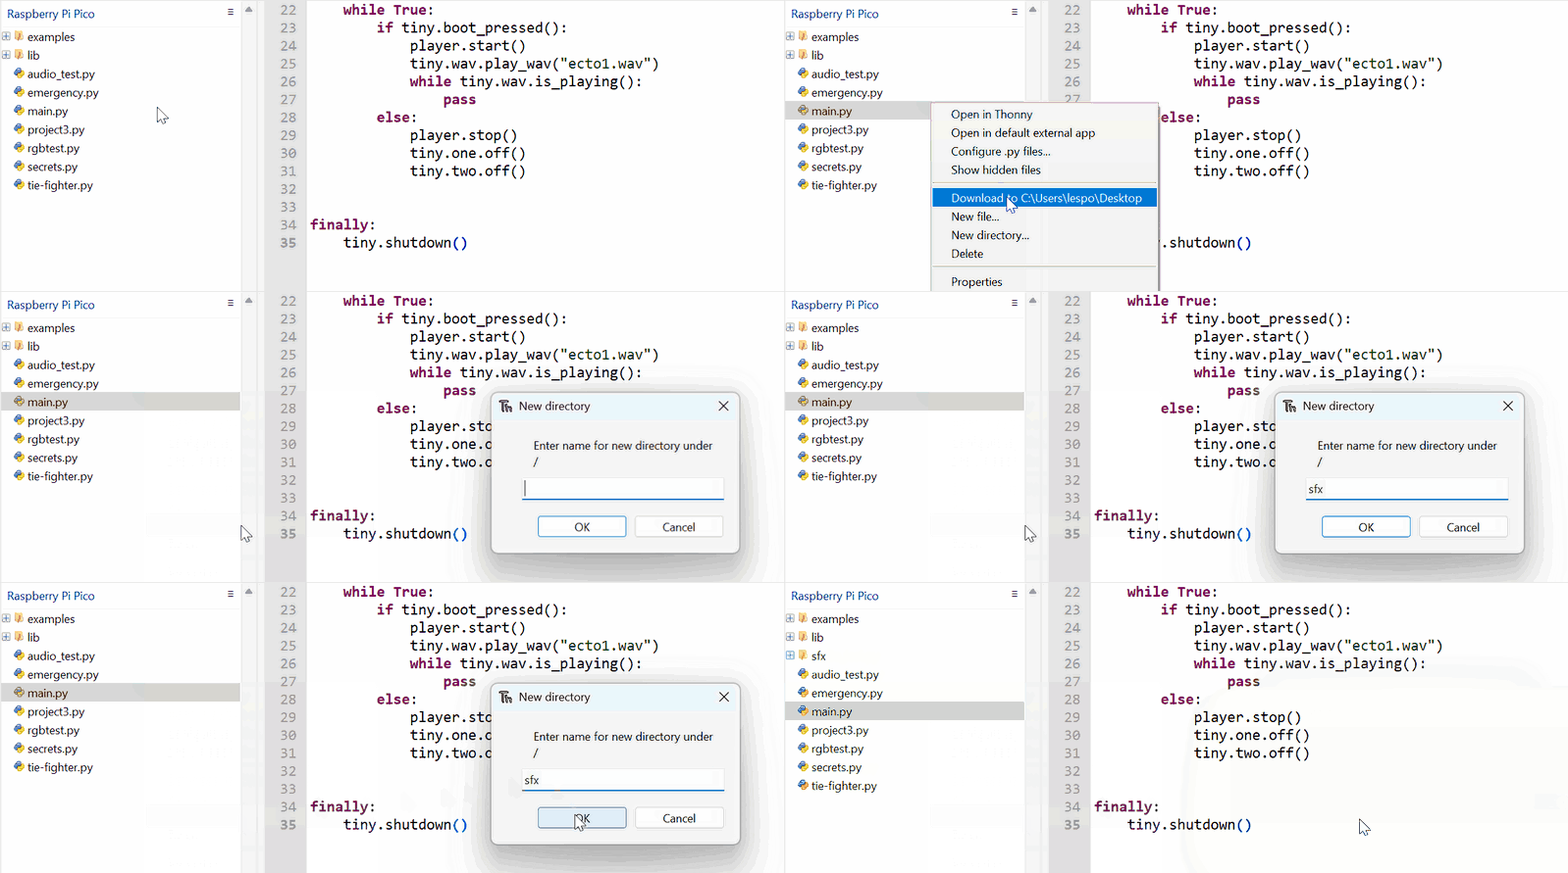
Double left click on
sfxto open that directory. This will enable us to upload an audio file directly to this directory.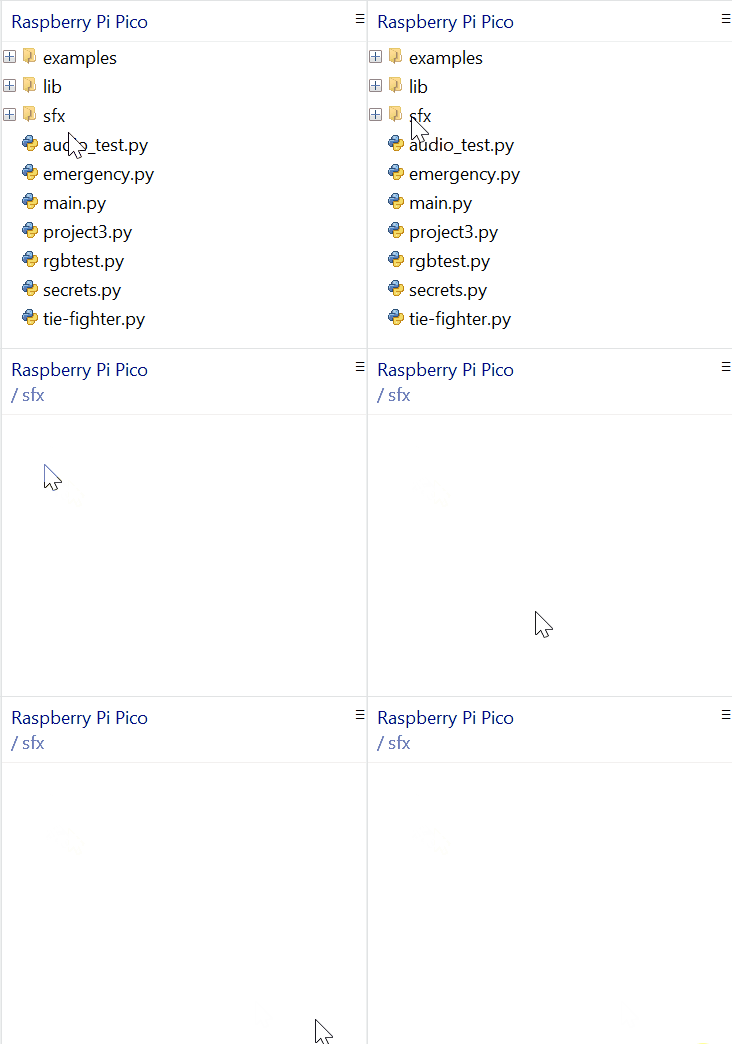
Under
Filesand in theThis computerpane, navigate to the audio file that you wish to upload to Tiny FX.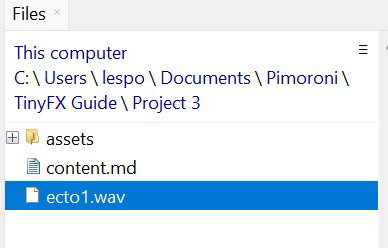
- Right click on the audio file and select
upload to sfx. The file transfer will take a little time, wait until it is complete.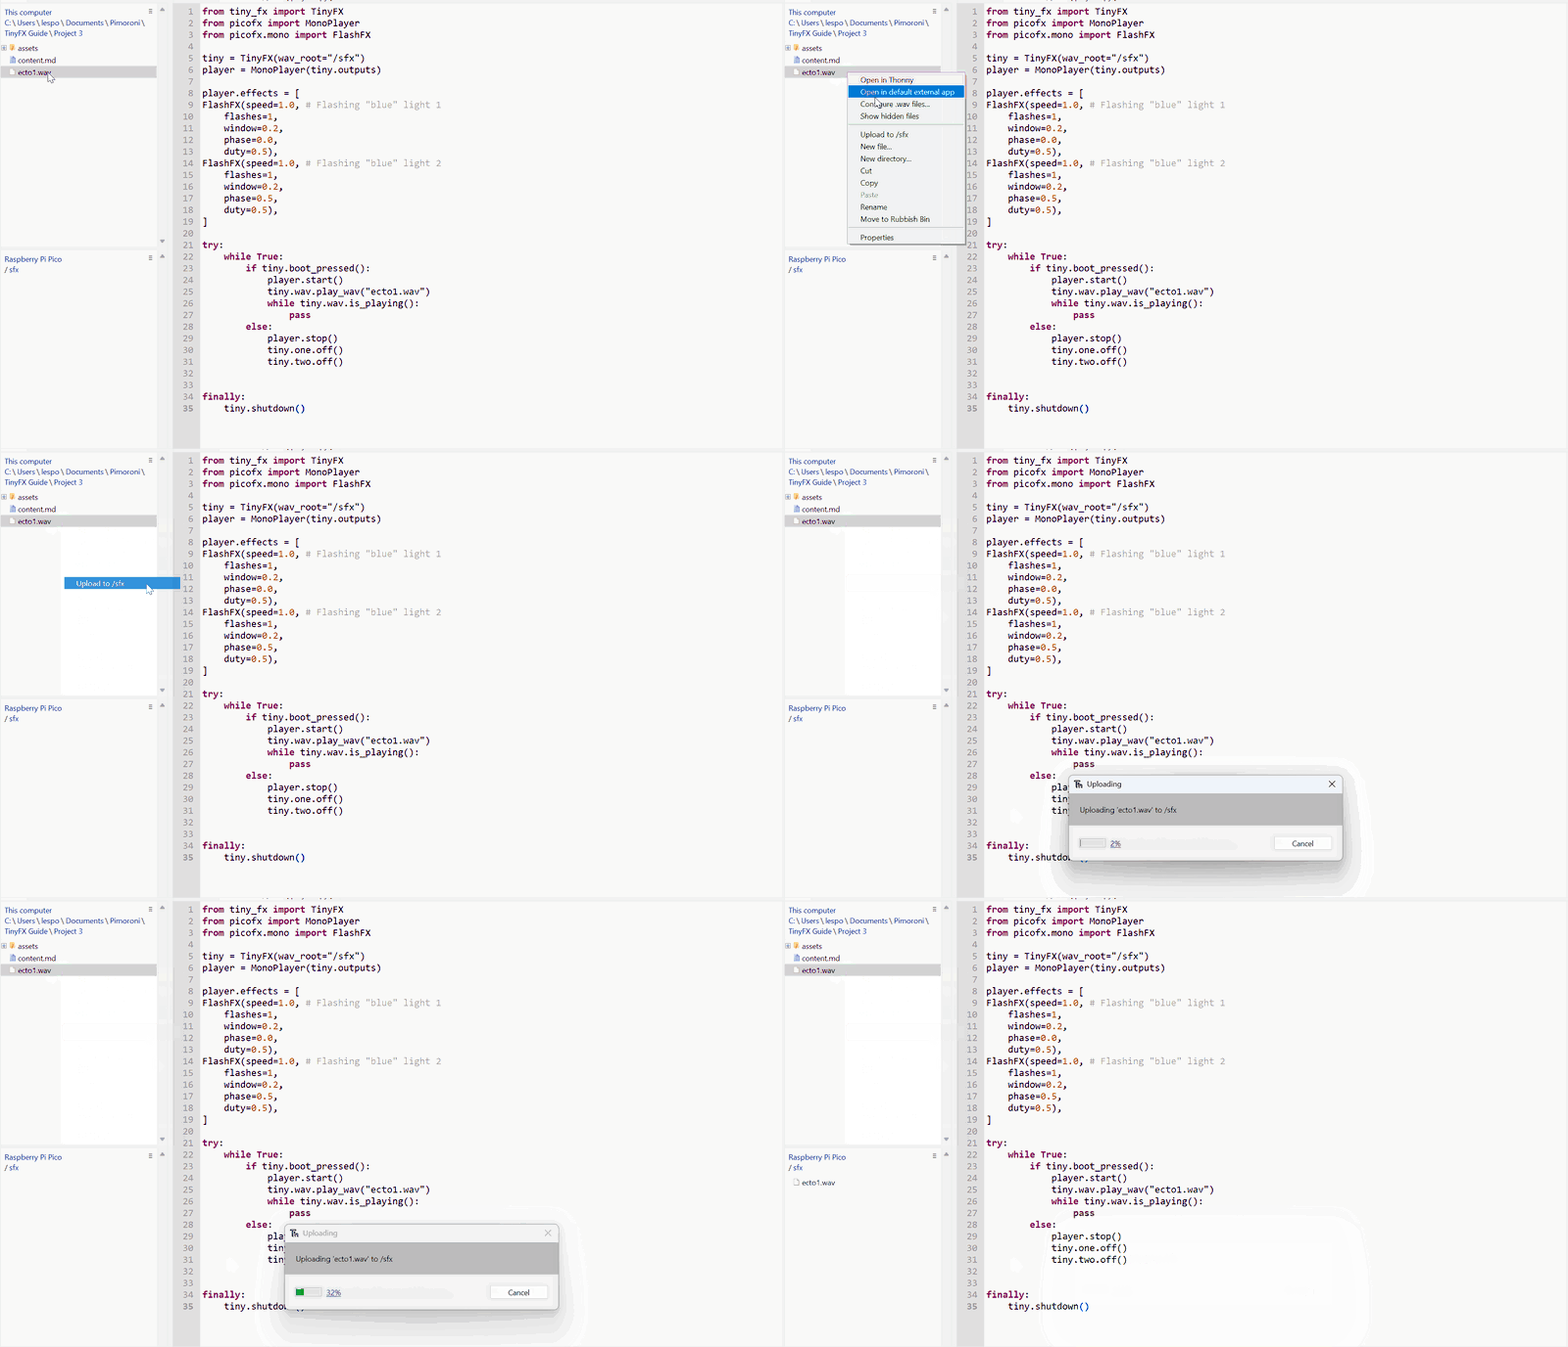
- Click on the green
RUNbutton to start the code. Click on the redSTOPbutton to stop the code at anytime.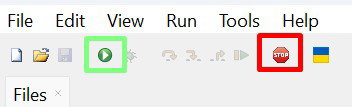
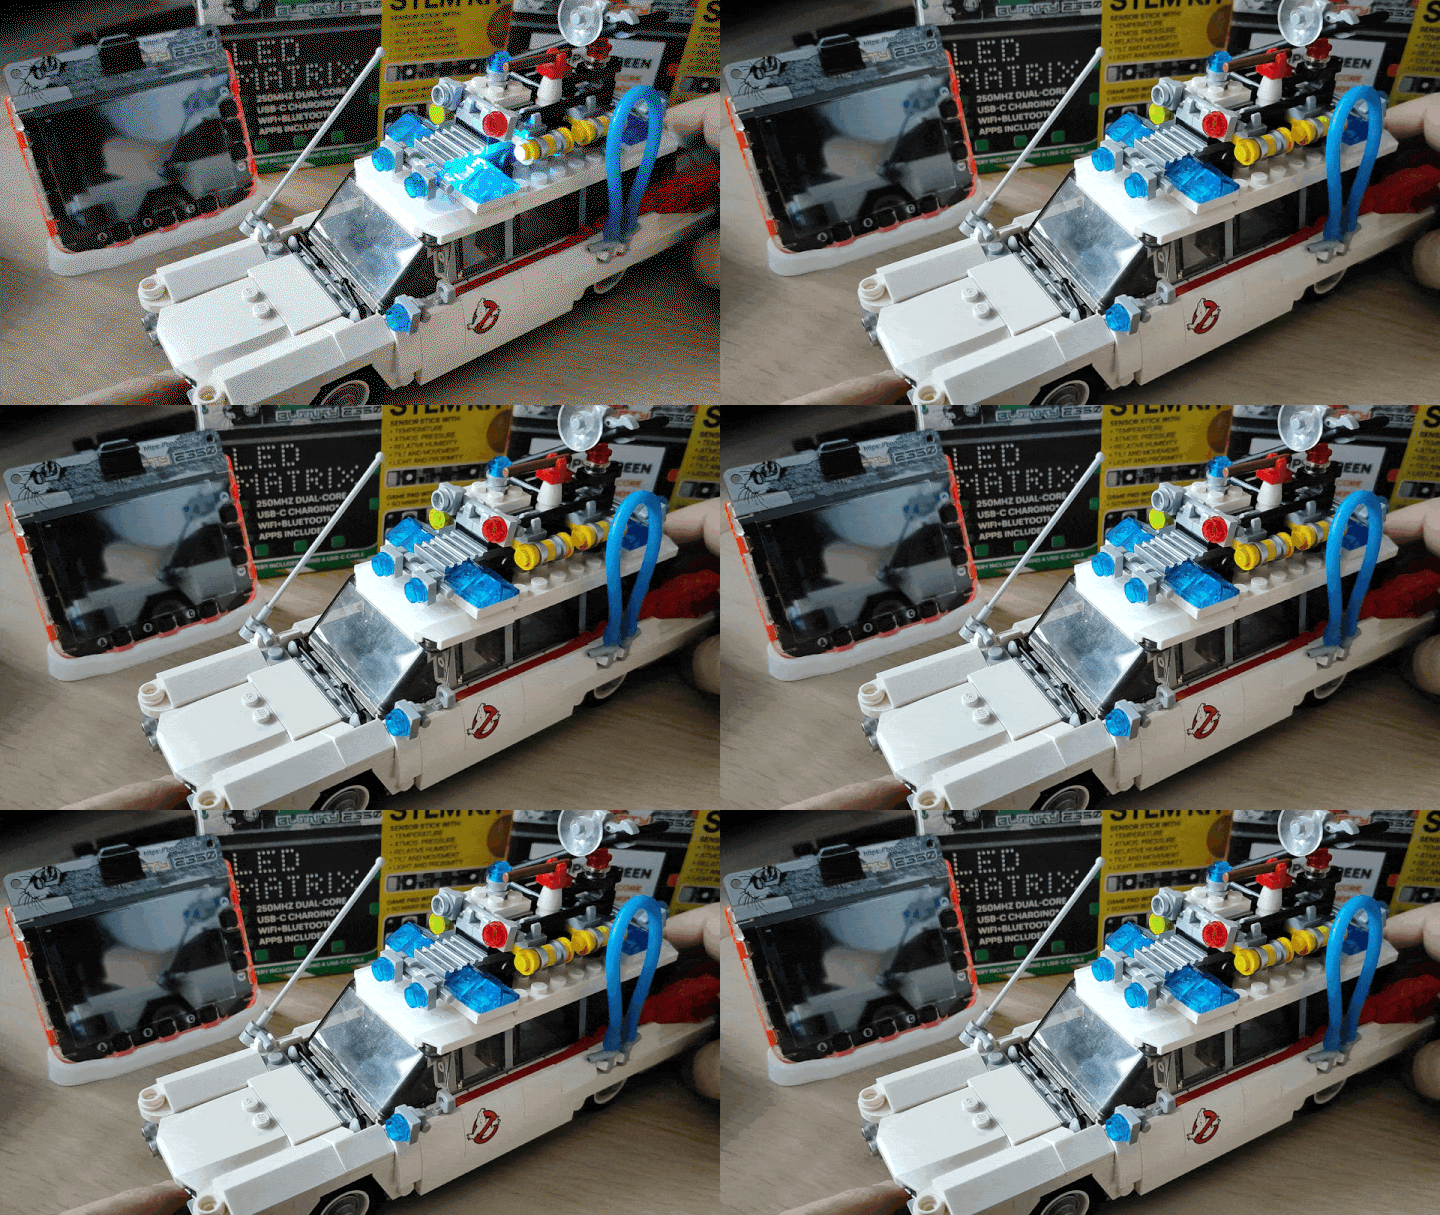
- Press BOOT on Tiny FX to start the lights and sound. You should hear the siren play and the lights will flash. The audio file will auto-stop and the lights will turn off when done.
What Have We Learnt
- How to generate audio with light effects.
- How to use audio files and light effects.
Search above to find more great tutorials and guides.